Setup Your Project
Detailed guide on setting up and configuring your project on Astraops.
Organization & Workflow
Learn how to organize your infrastructure with Projects and IADs for better management and version control.
Overview
Astraops uses a structured approach to organize your cloud infrastructure:
- Projects - Logical groupings for your infrastructure
- IADs - Visual infrastructure blueprints with version control
Step 1: Projects
Projects help organize infrastructure logically for better management and provide a structured approach to cloud resource organization.
To Create a Project:
-
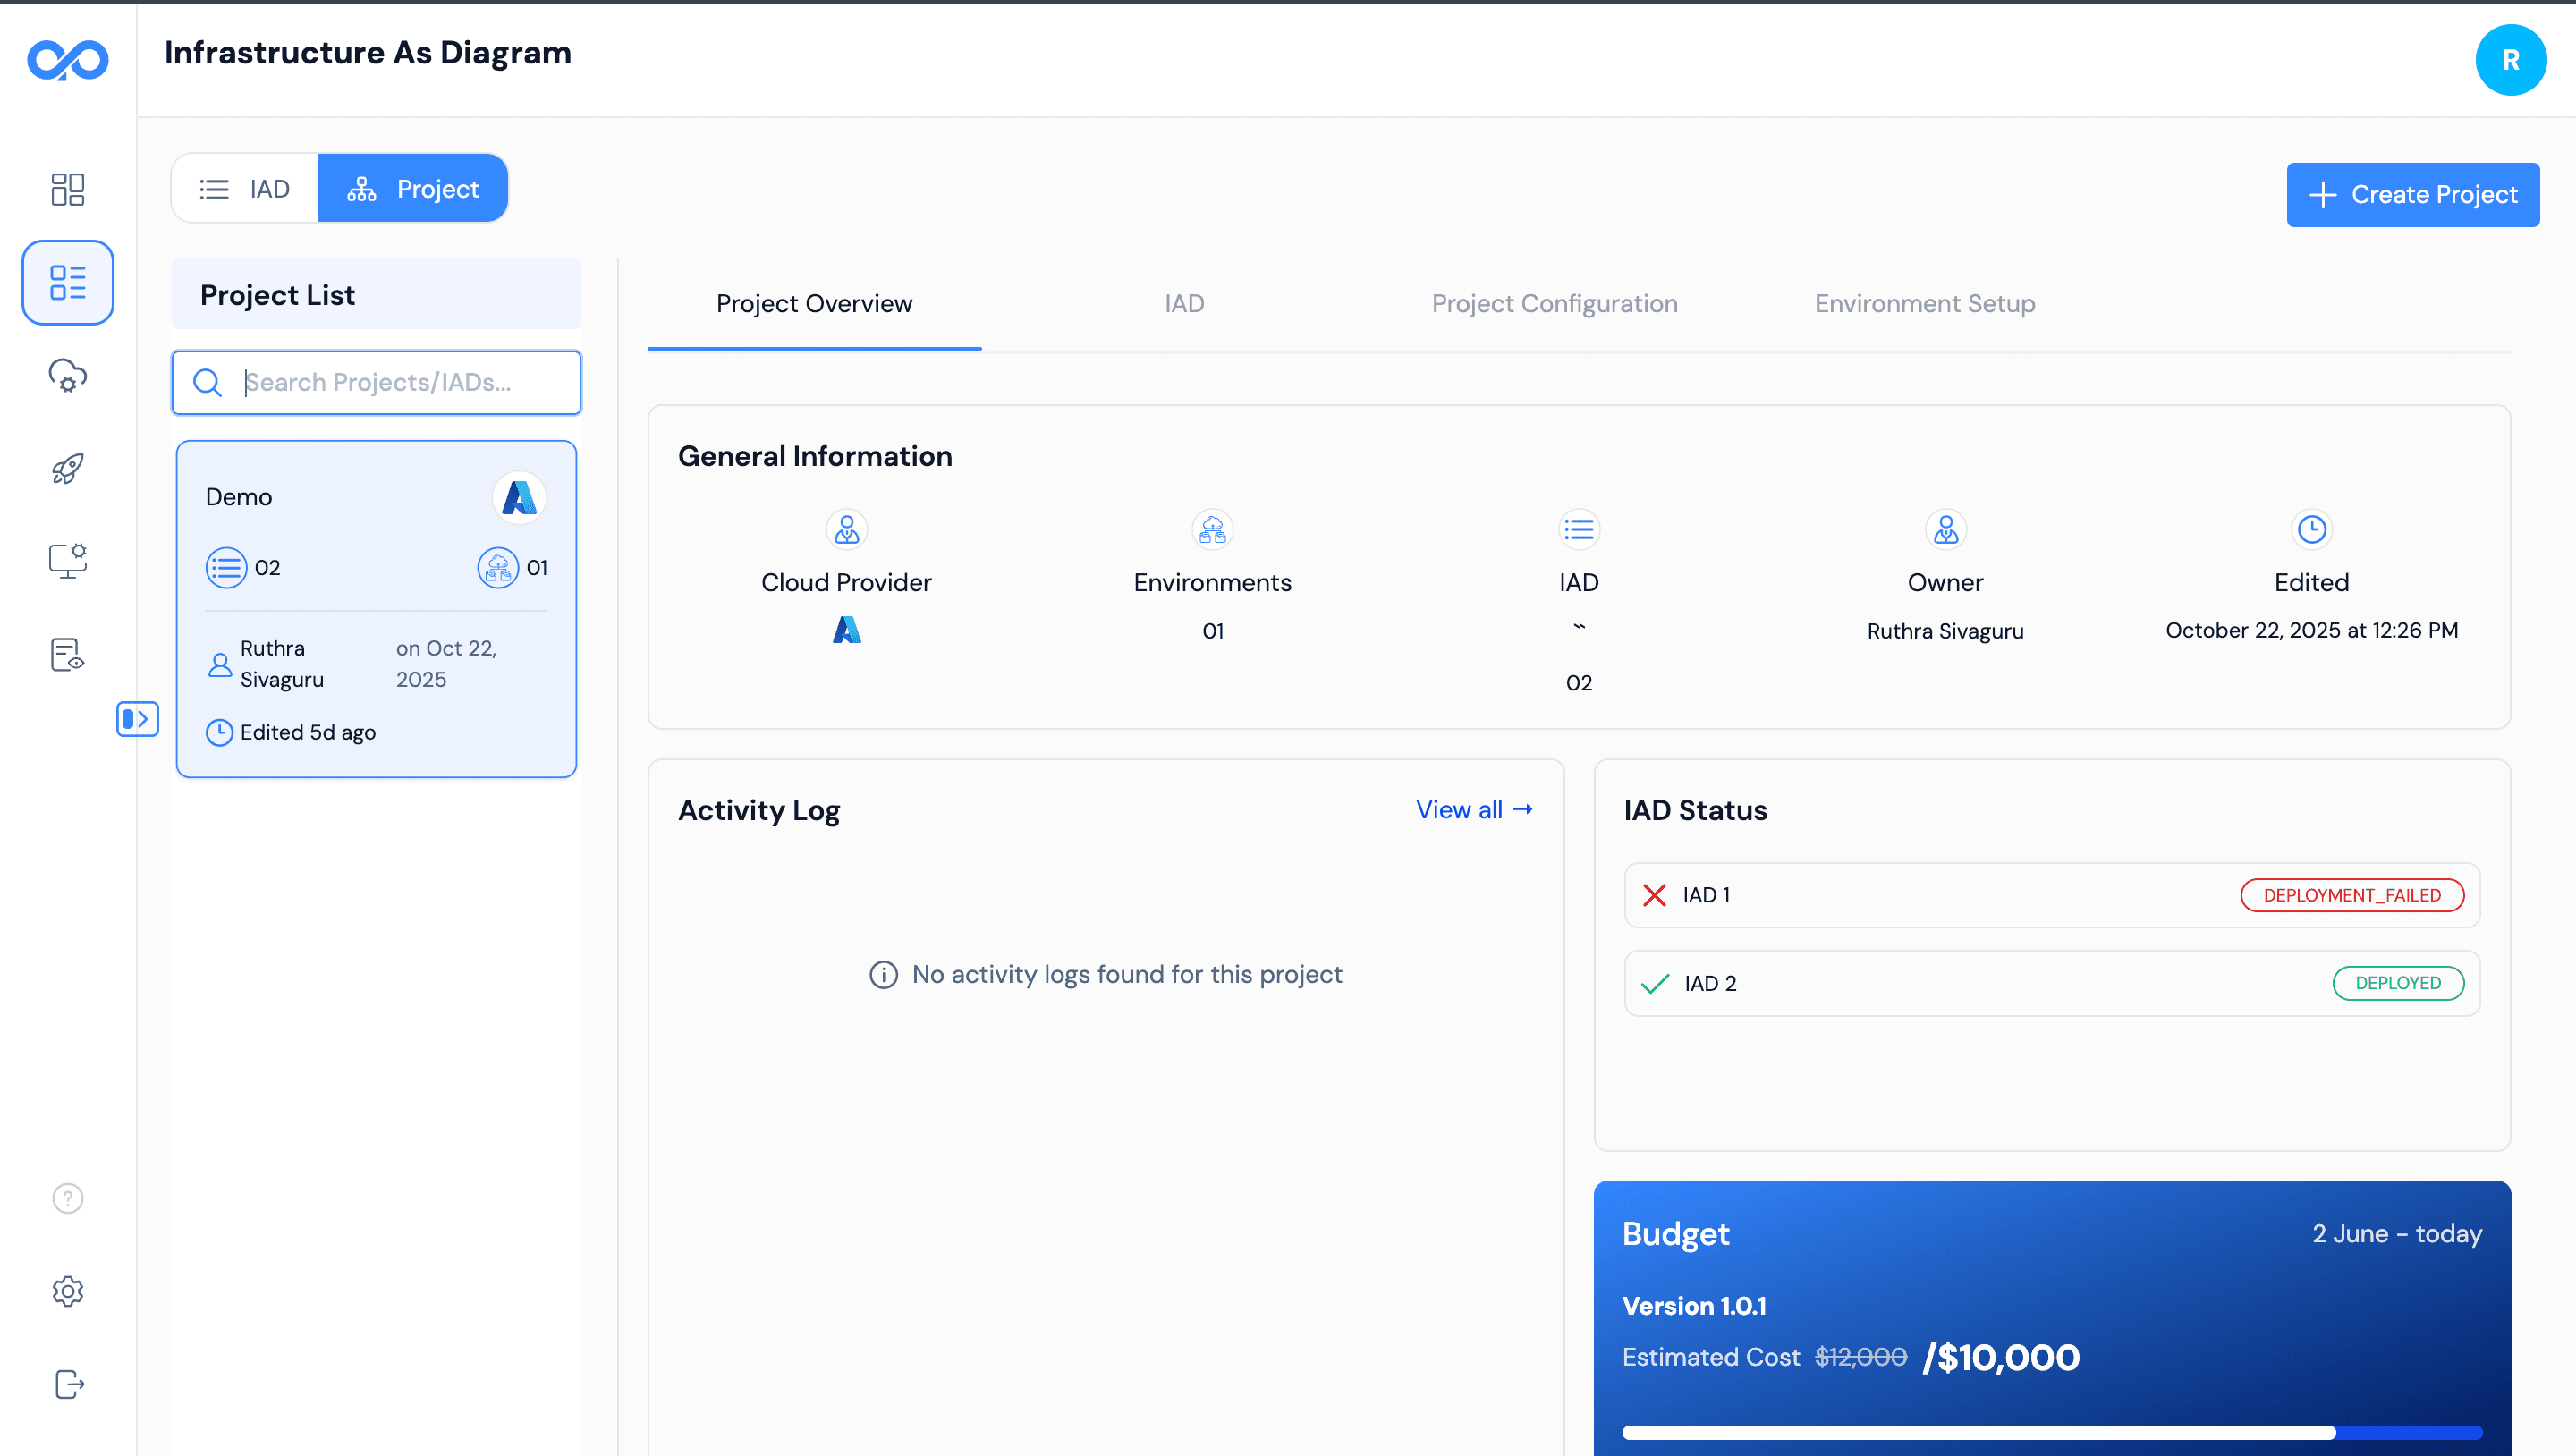
Navigate to Projects Dashboard
- Access the main projects section from the navigation
- View all existing projects and their status
- Look for the project creation options
Project Creation Interface Access the create project interface to start building your cloud infrastructure with project management tools.
-
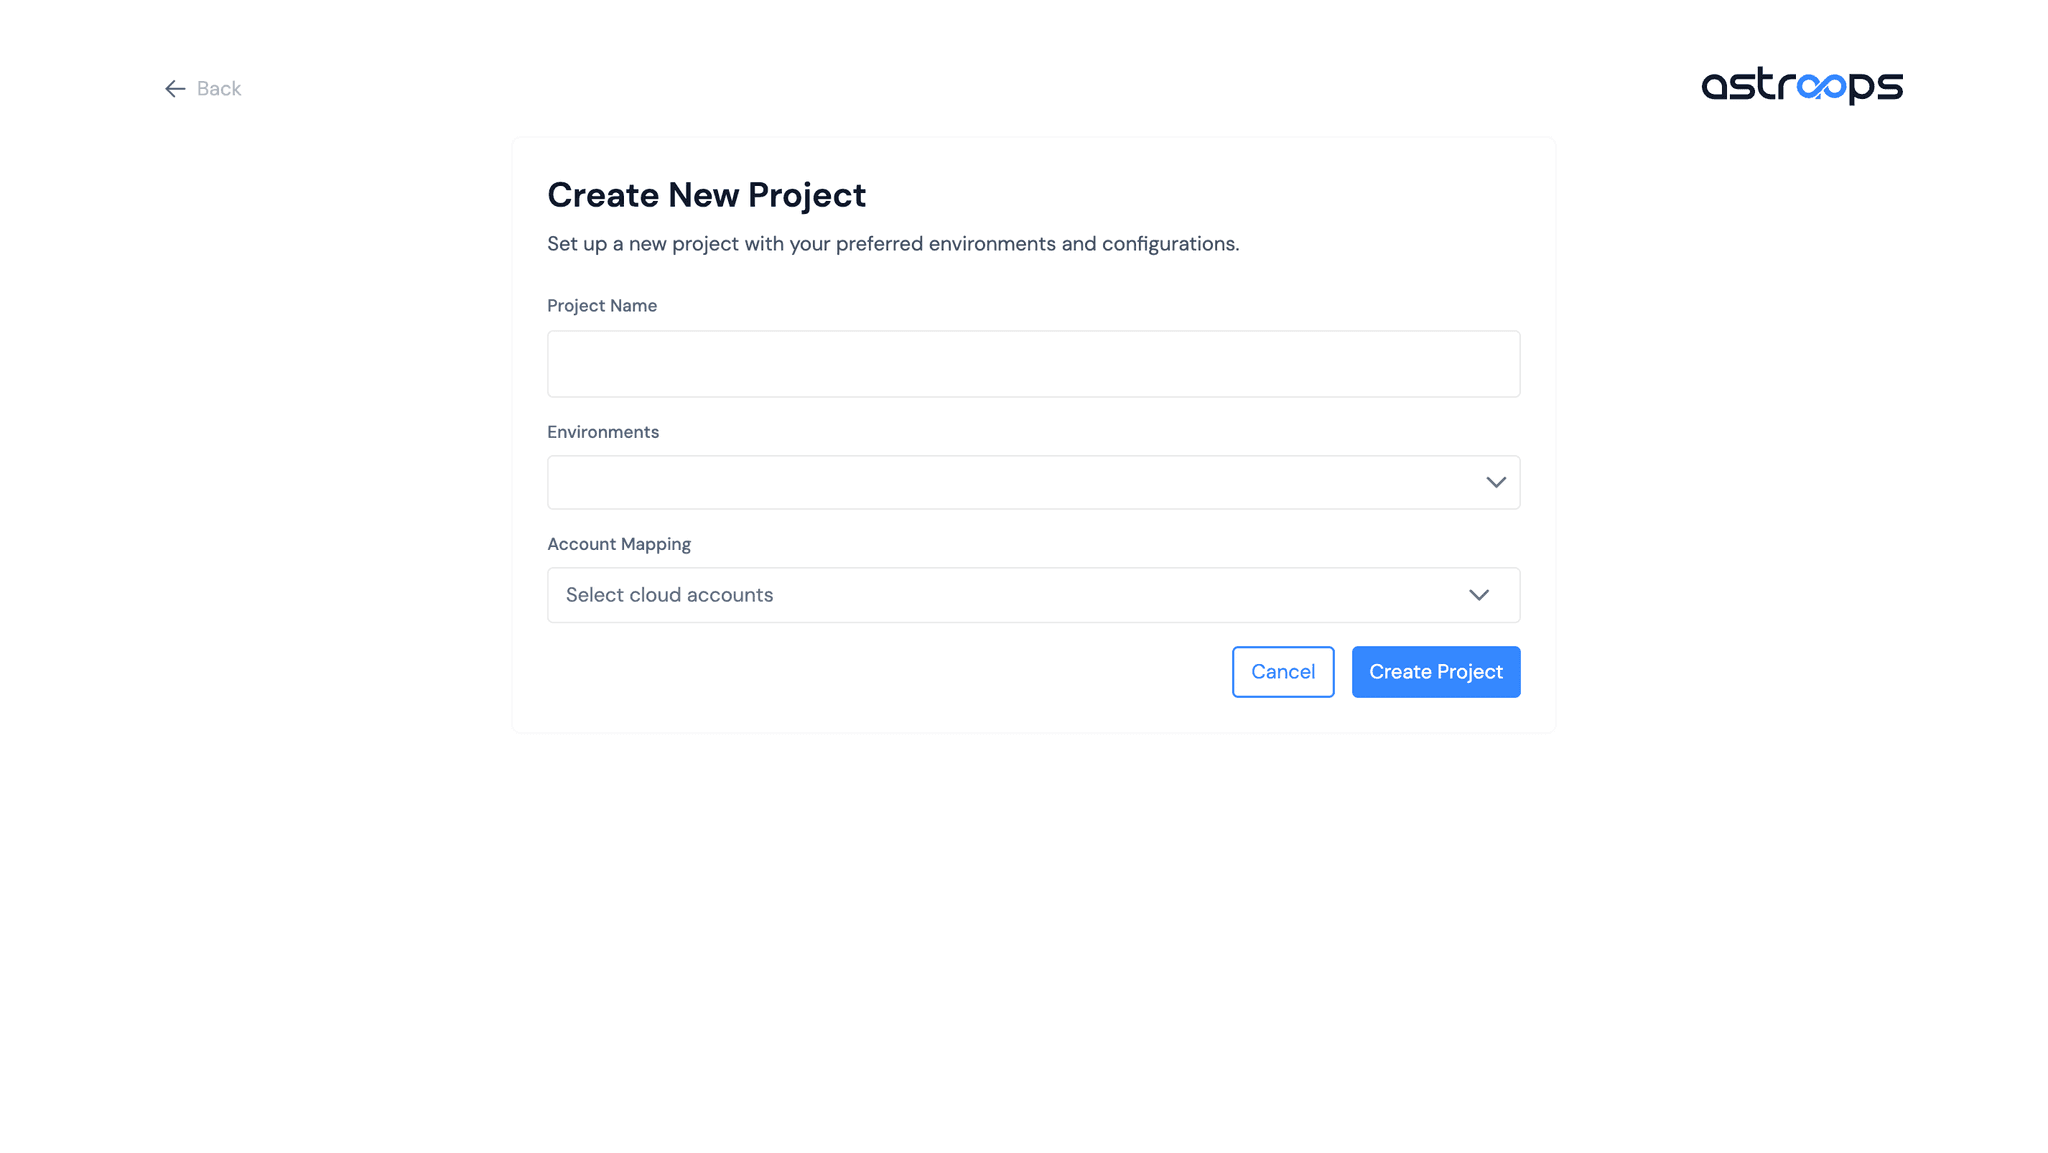
Click "Create Project"
- Enter your project name and details
- Select the appropriate environment
- Choose cloud account if needed
- Complete the project setup
Project Configuration Panel Configure your project settings with name, environment selection, and optional cloud account integration.

-
Configure Project Details
- Project Name - Choose a descriptive name for your project
- Environment - Select Dev, Staging, or Production
- Cloud Account - Choose AWS, Azure, or Multi-cloud Account (Optional)
Project Setup Form Complete the project creation with name, environment selection, and optional cloud account integration for your infrastructure management.
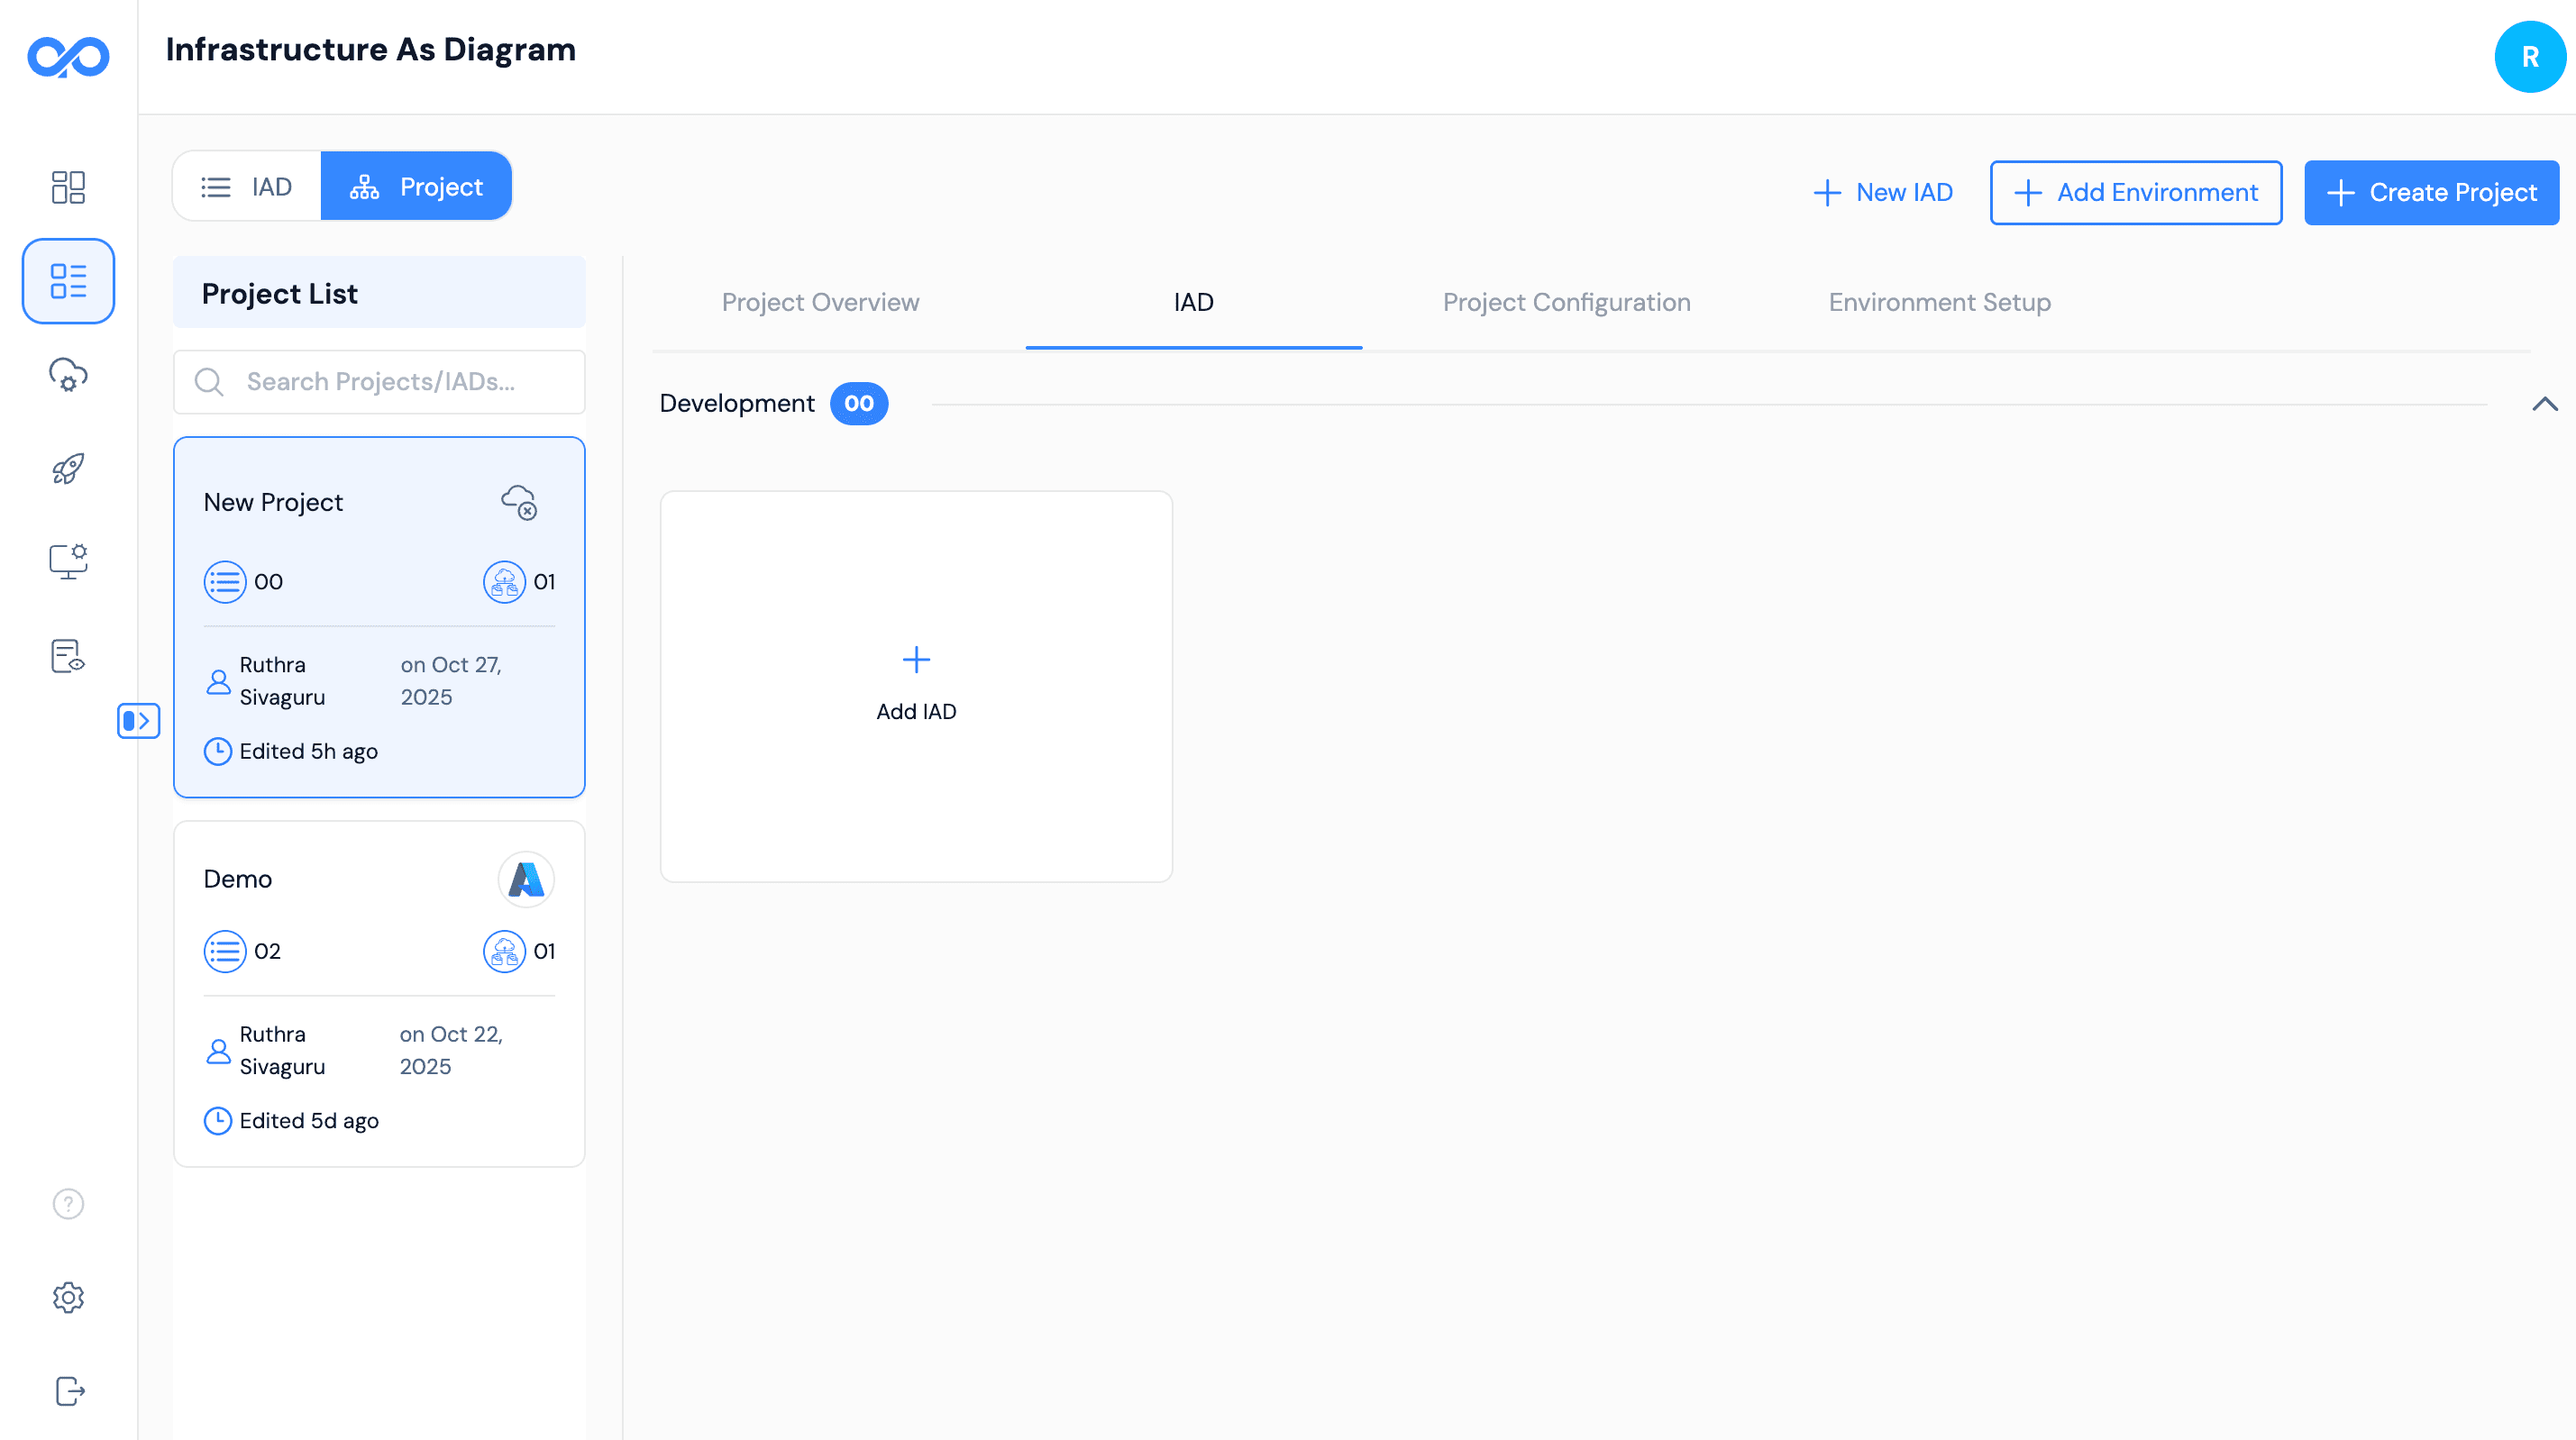
Project Created!
Your project is now ready to use! You can now create IADs and manage your infrastructure within this project.
Project Successfully Added View your newly created project in the projects dashboard with all configuration options and ready for infrastructure creation.
Project Configuration Options:
Categorization
Organize projects with tags and descriptions
Environment Settings
Configure environment-specific settings
Resource Management
Manage your infrastructure resources
Budget Tracking
Monitor and control costs
Best Practices:
- Organize by Purpose - Create separate projects for different applications or environments
- Use Descriptive Names - Make it easy to identify projects at a glance
- Tag Consistently - Use consistent tagging for better organization
- Set Budget Alerts - Monitor costs for each project
Step 2: IADs (Infrastructure as Diagram)
IADs are drag-and-drop, version-controlled architecture blueprints inside each project.
What are IADs?
Infrastructure as Diagram (IAD) provides:
- Visual drag-and-drop canvas
- Version control for infrastructure
- Track changes over time
- Clear visualization of architecture
Visual Infrastructure
IADs let you design, version, and manage your cloud infrastructure visually - no more complex config files!
To Create an IAD:
-
Navigate to Your Project
- Access the project where you want to create infrastructure
- View project details and available options
- Locate the IAD creation section
-
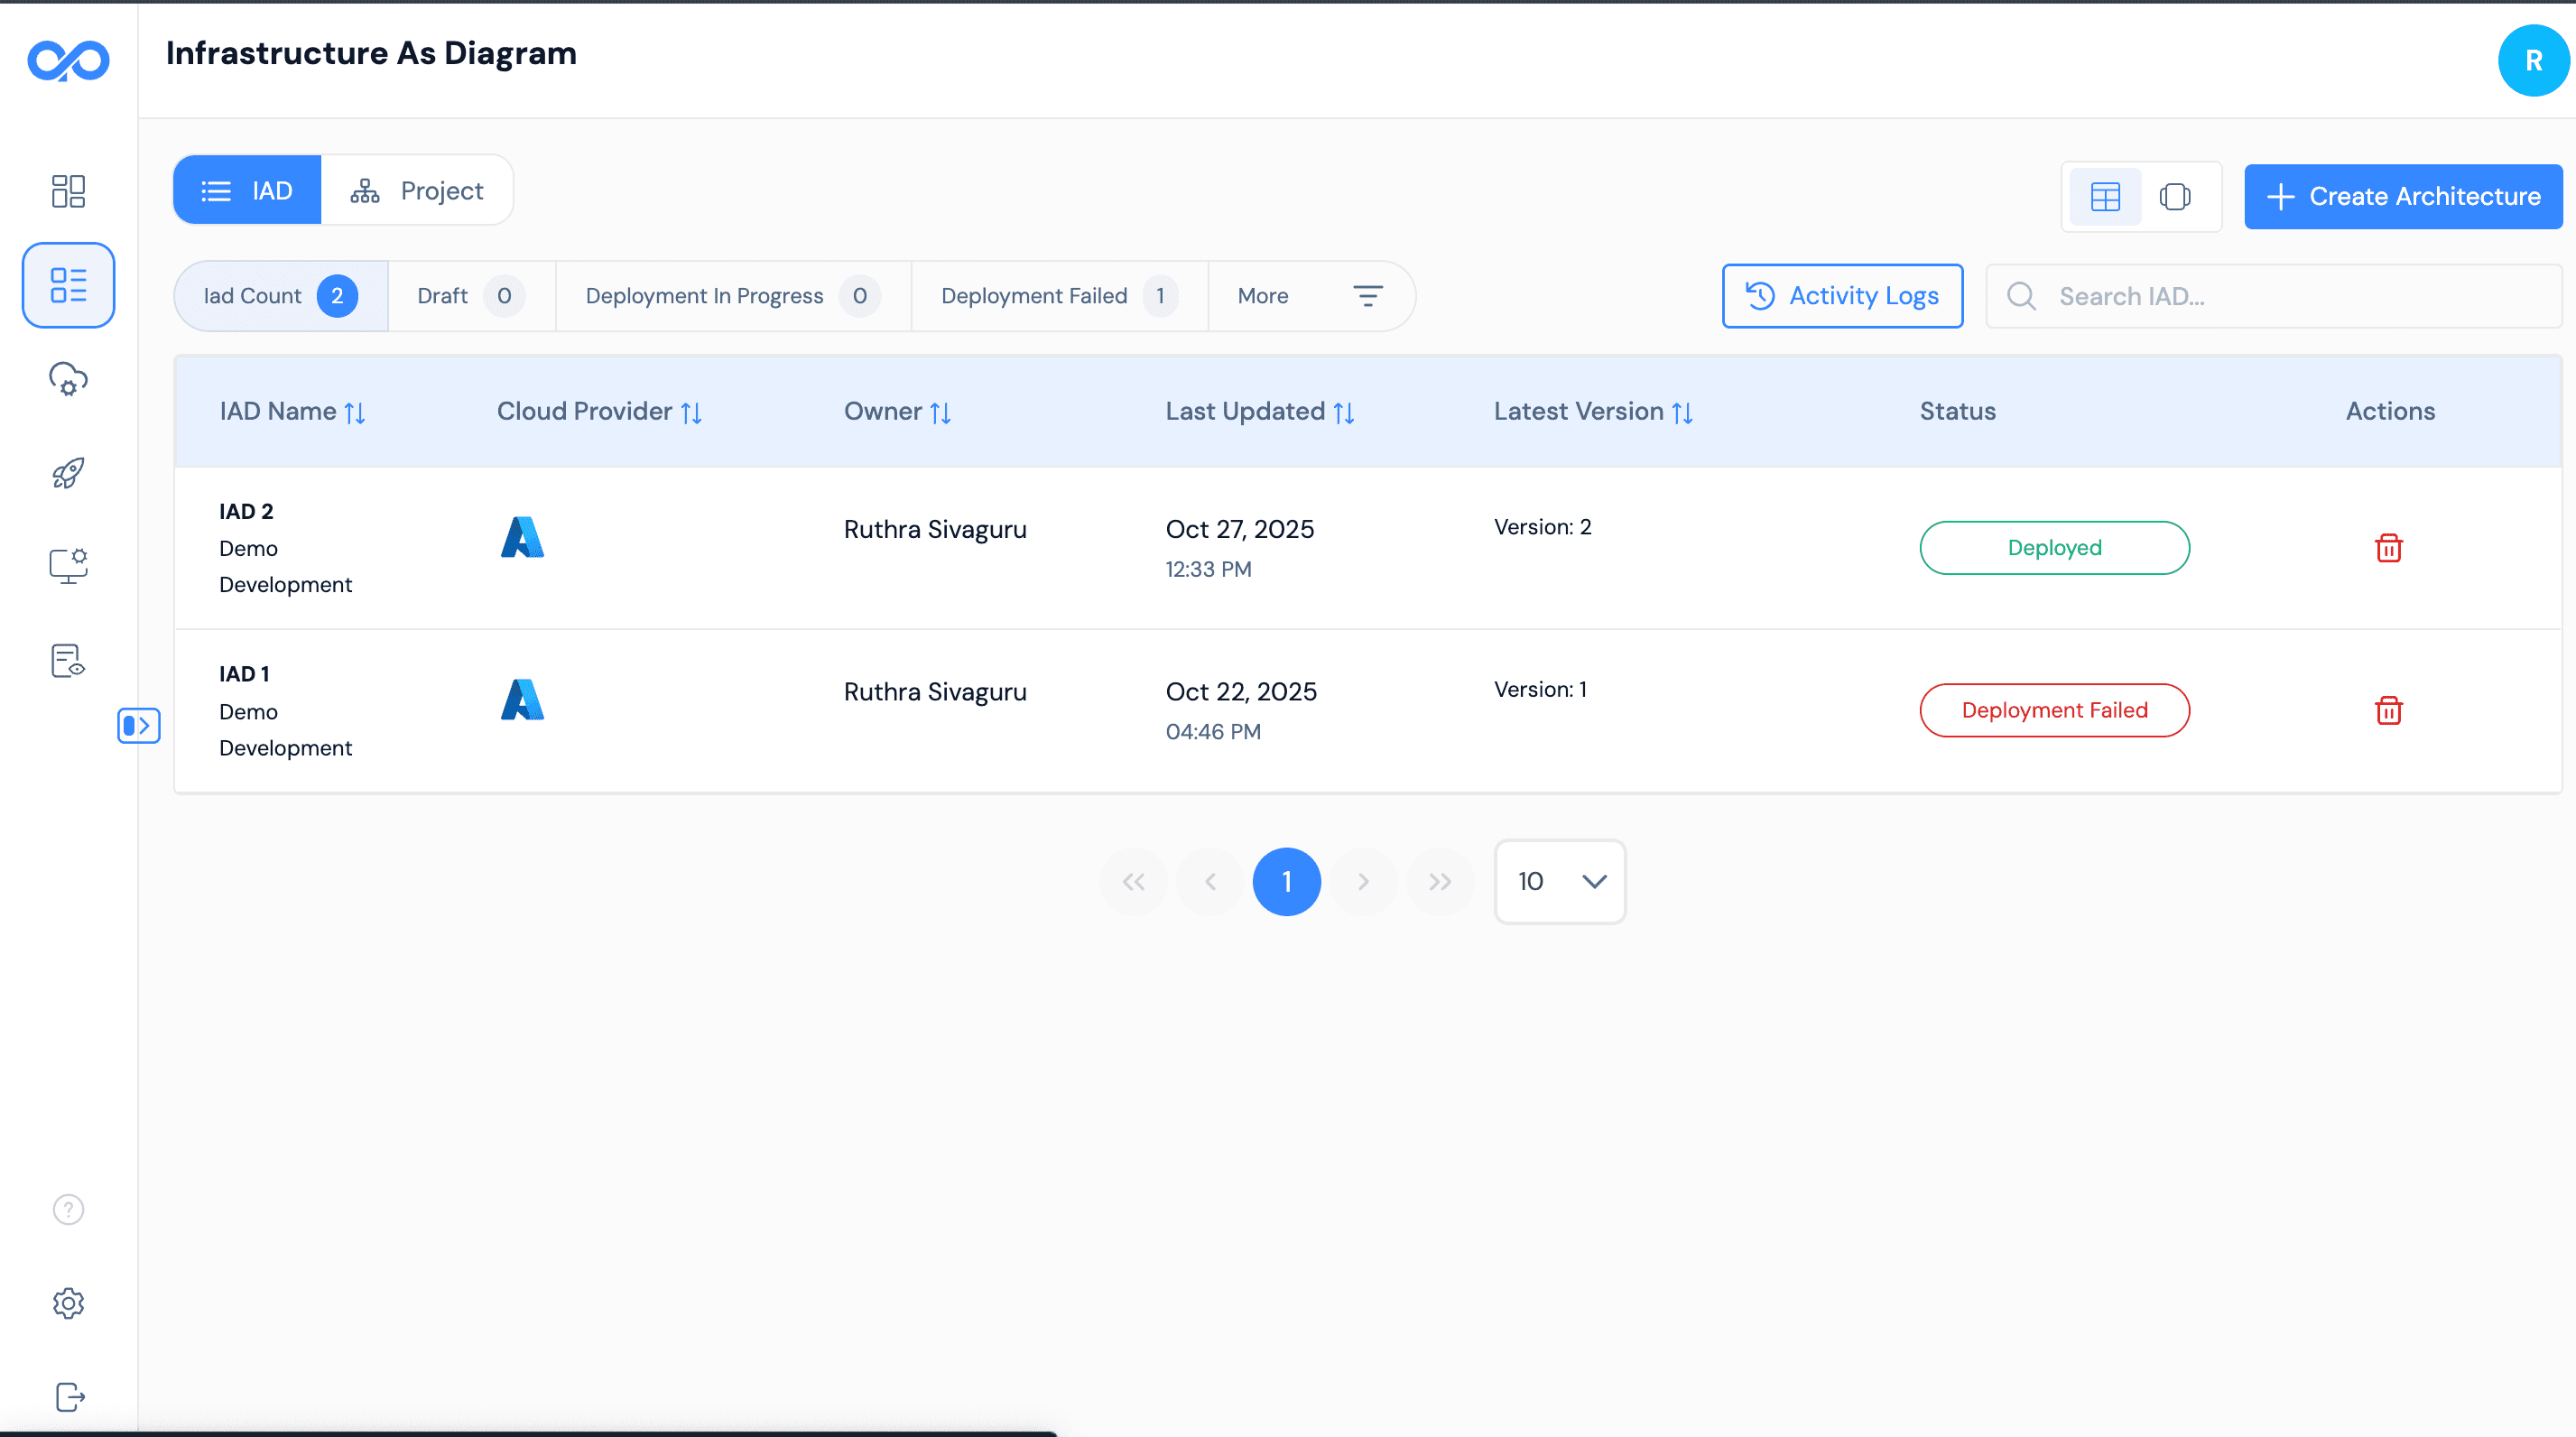
Start Architecture Creation
- Click on the create architecture option
- Choose your project and environment
- Begin the architecture design process
Create Architecture Interface Start creating your infrastructure architecture with project selection and environment configuration options.
-
Set Up Architecture Configuration
- Project Name - Choose a project name for your architecture
- Environment - Set the target environment (Dev, Staging, Production)
Architecture Setup Interface Configure your infrastructure architecture with project name, environment selection, and cloud account integration.

-
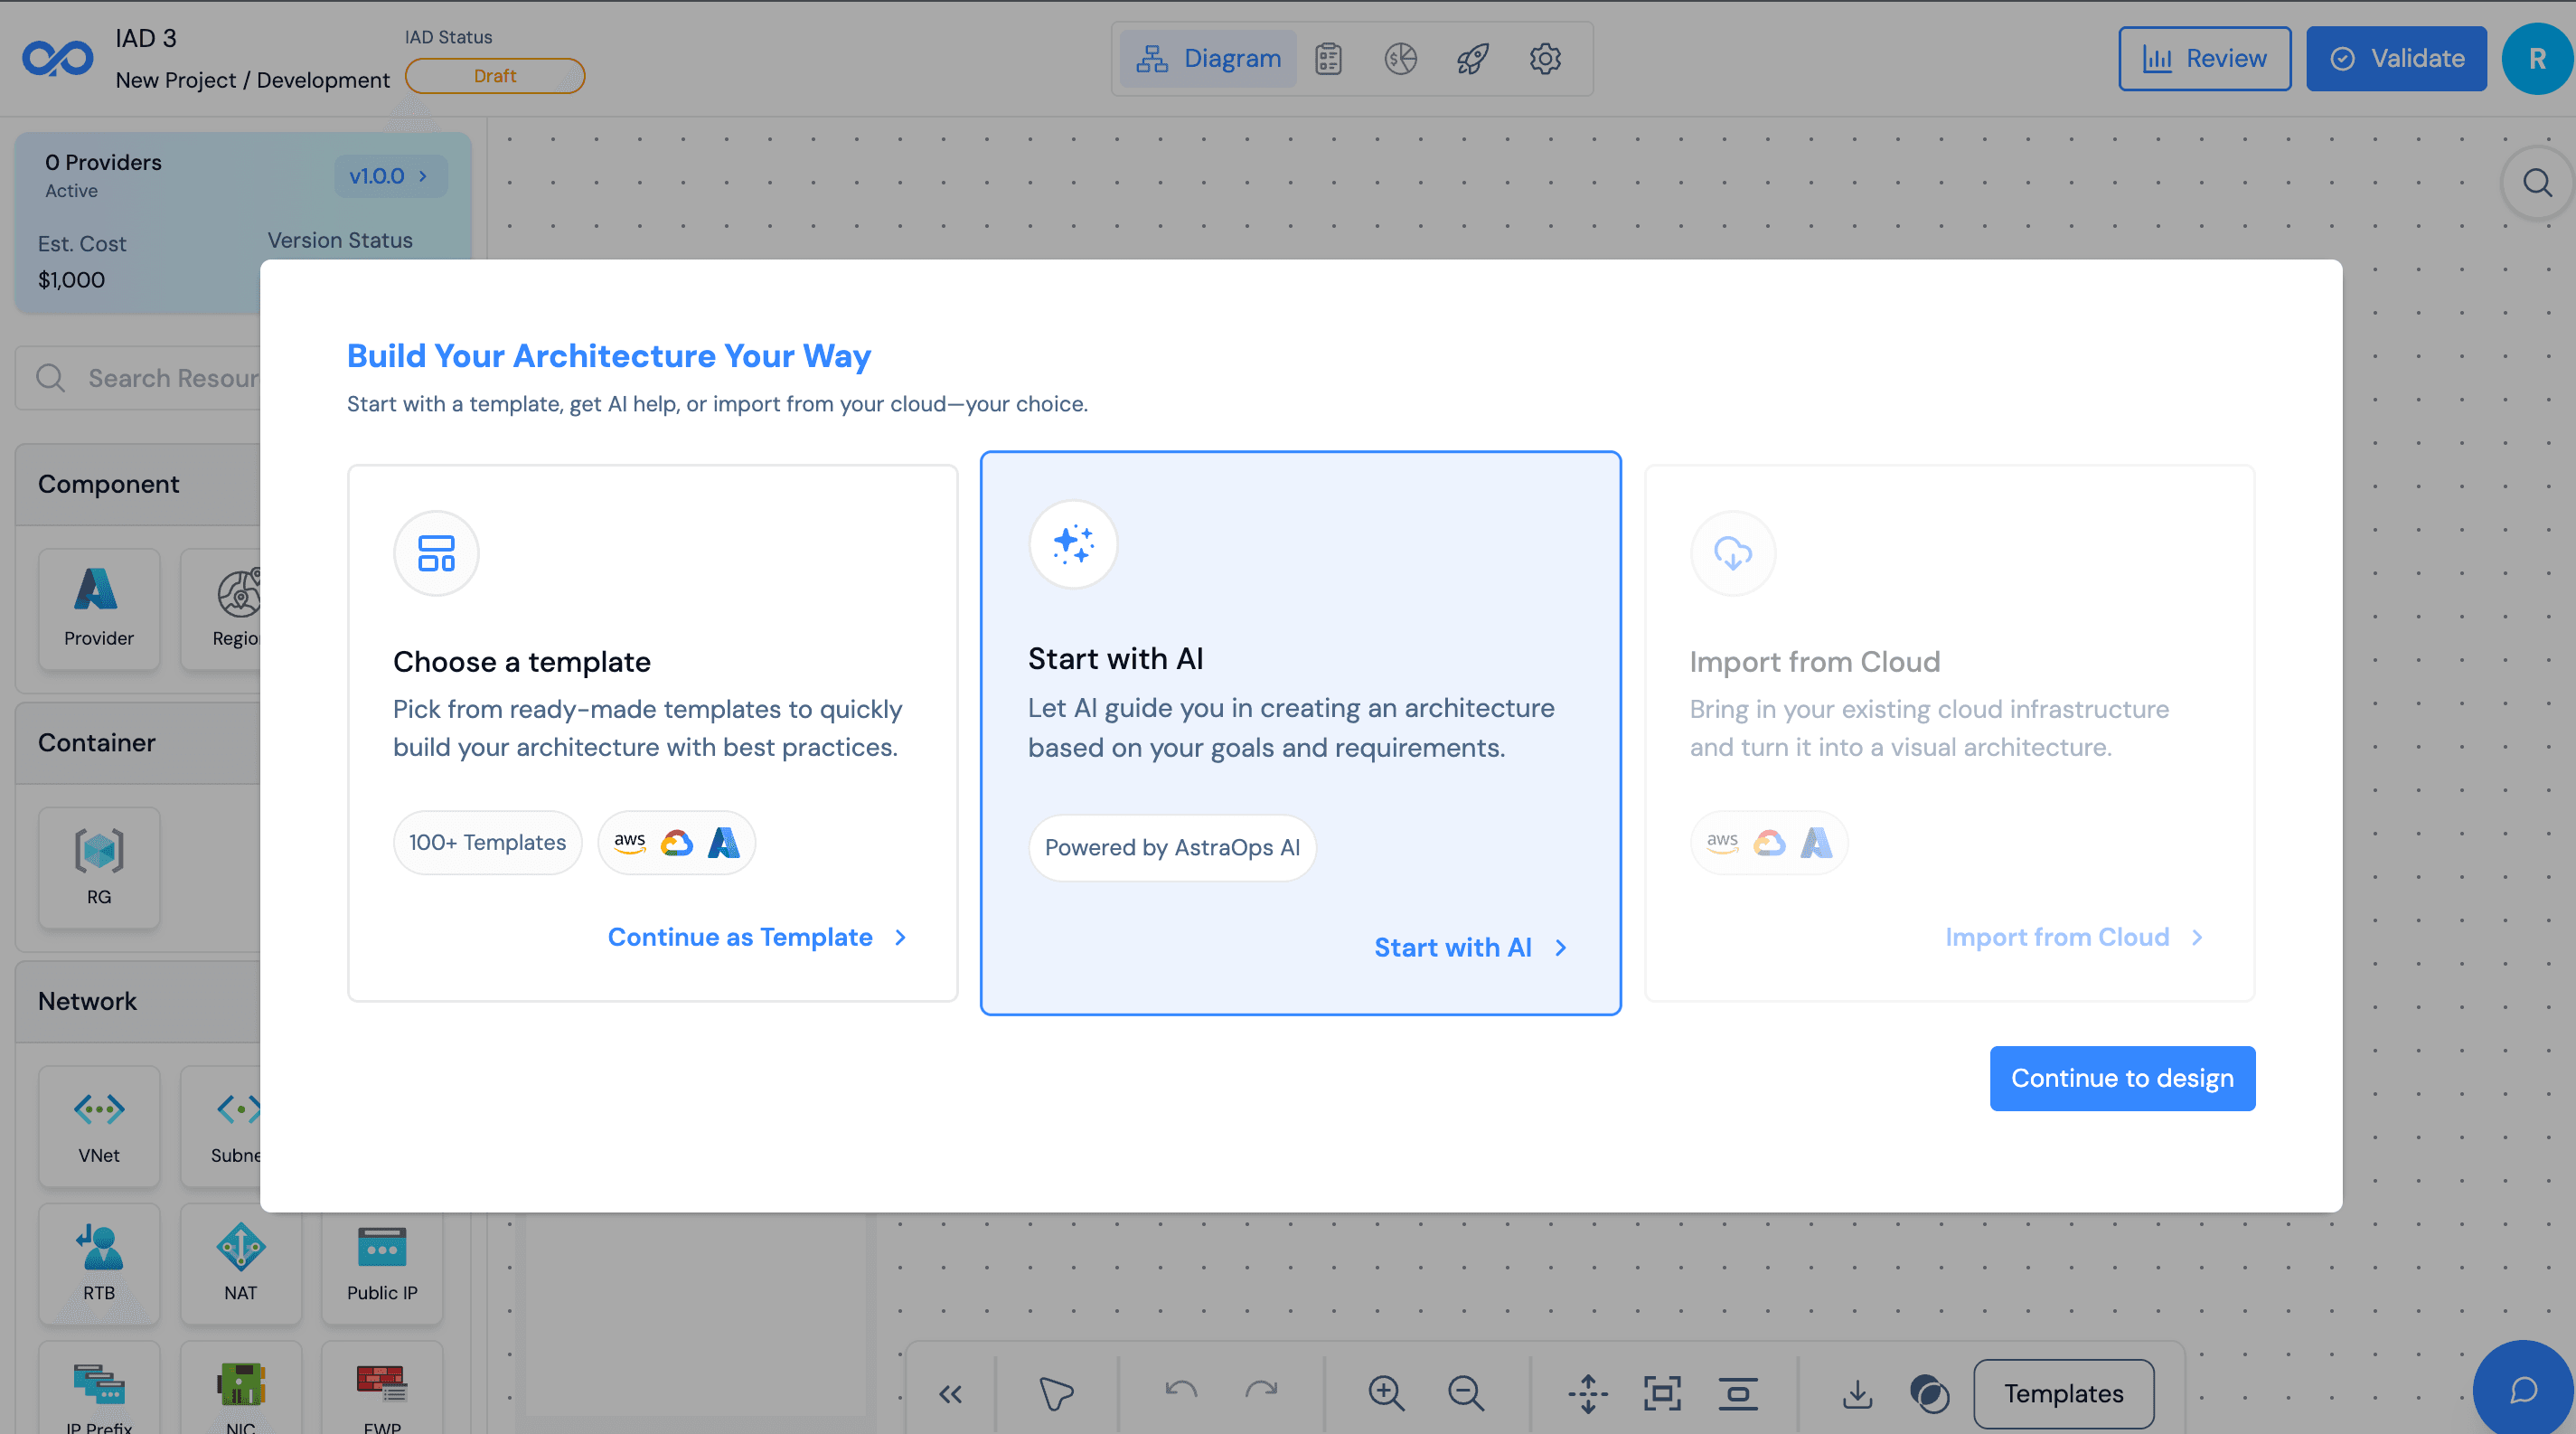
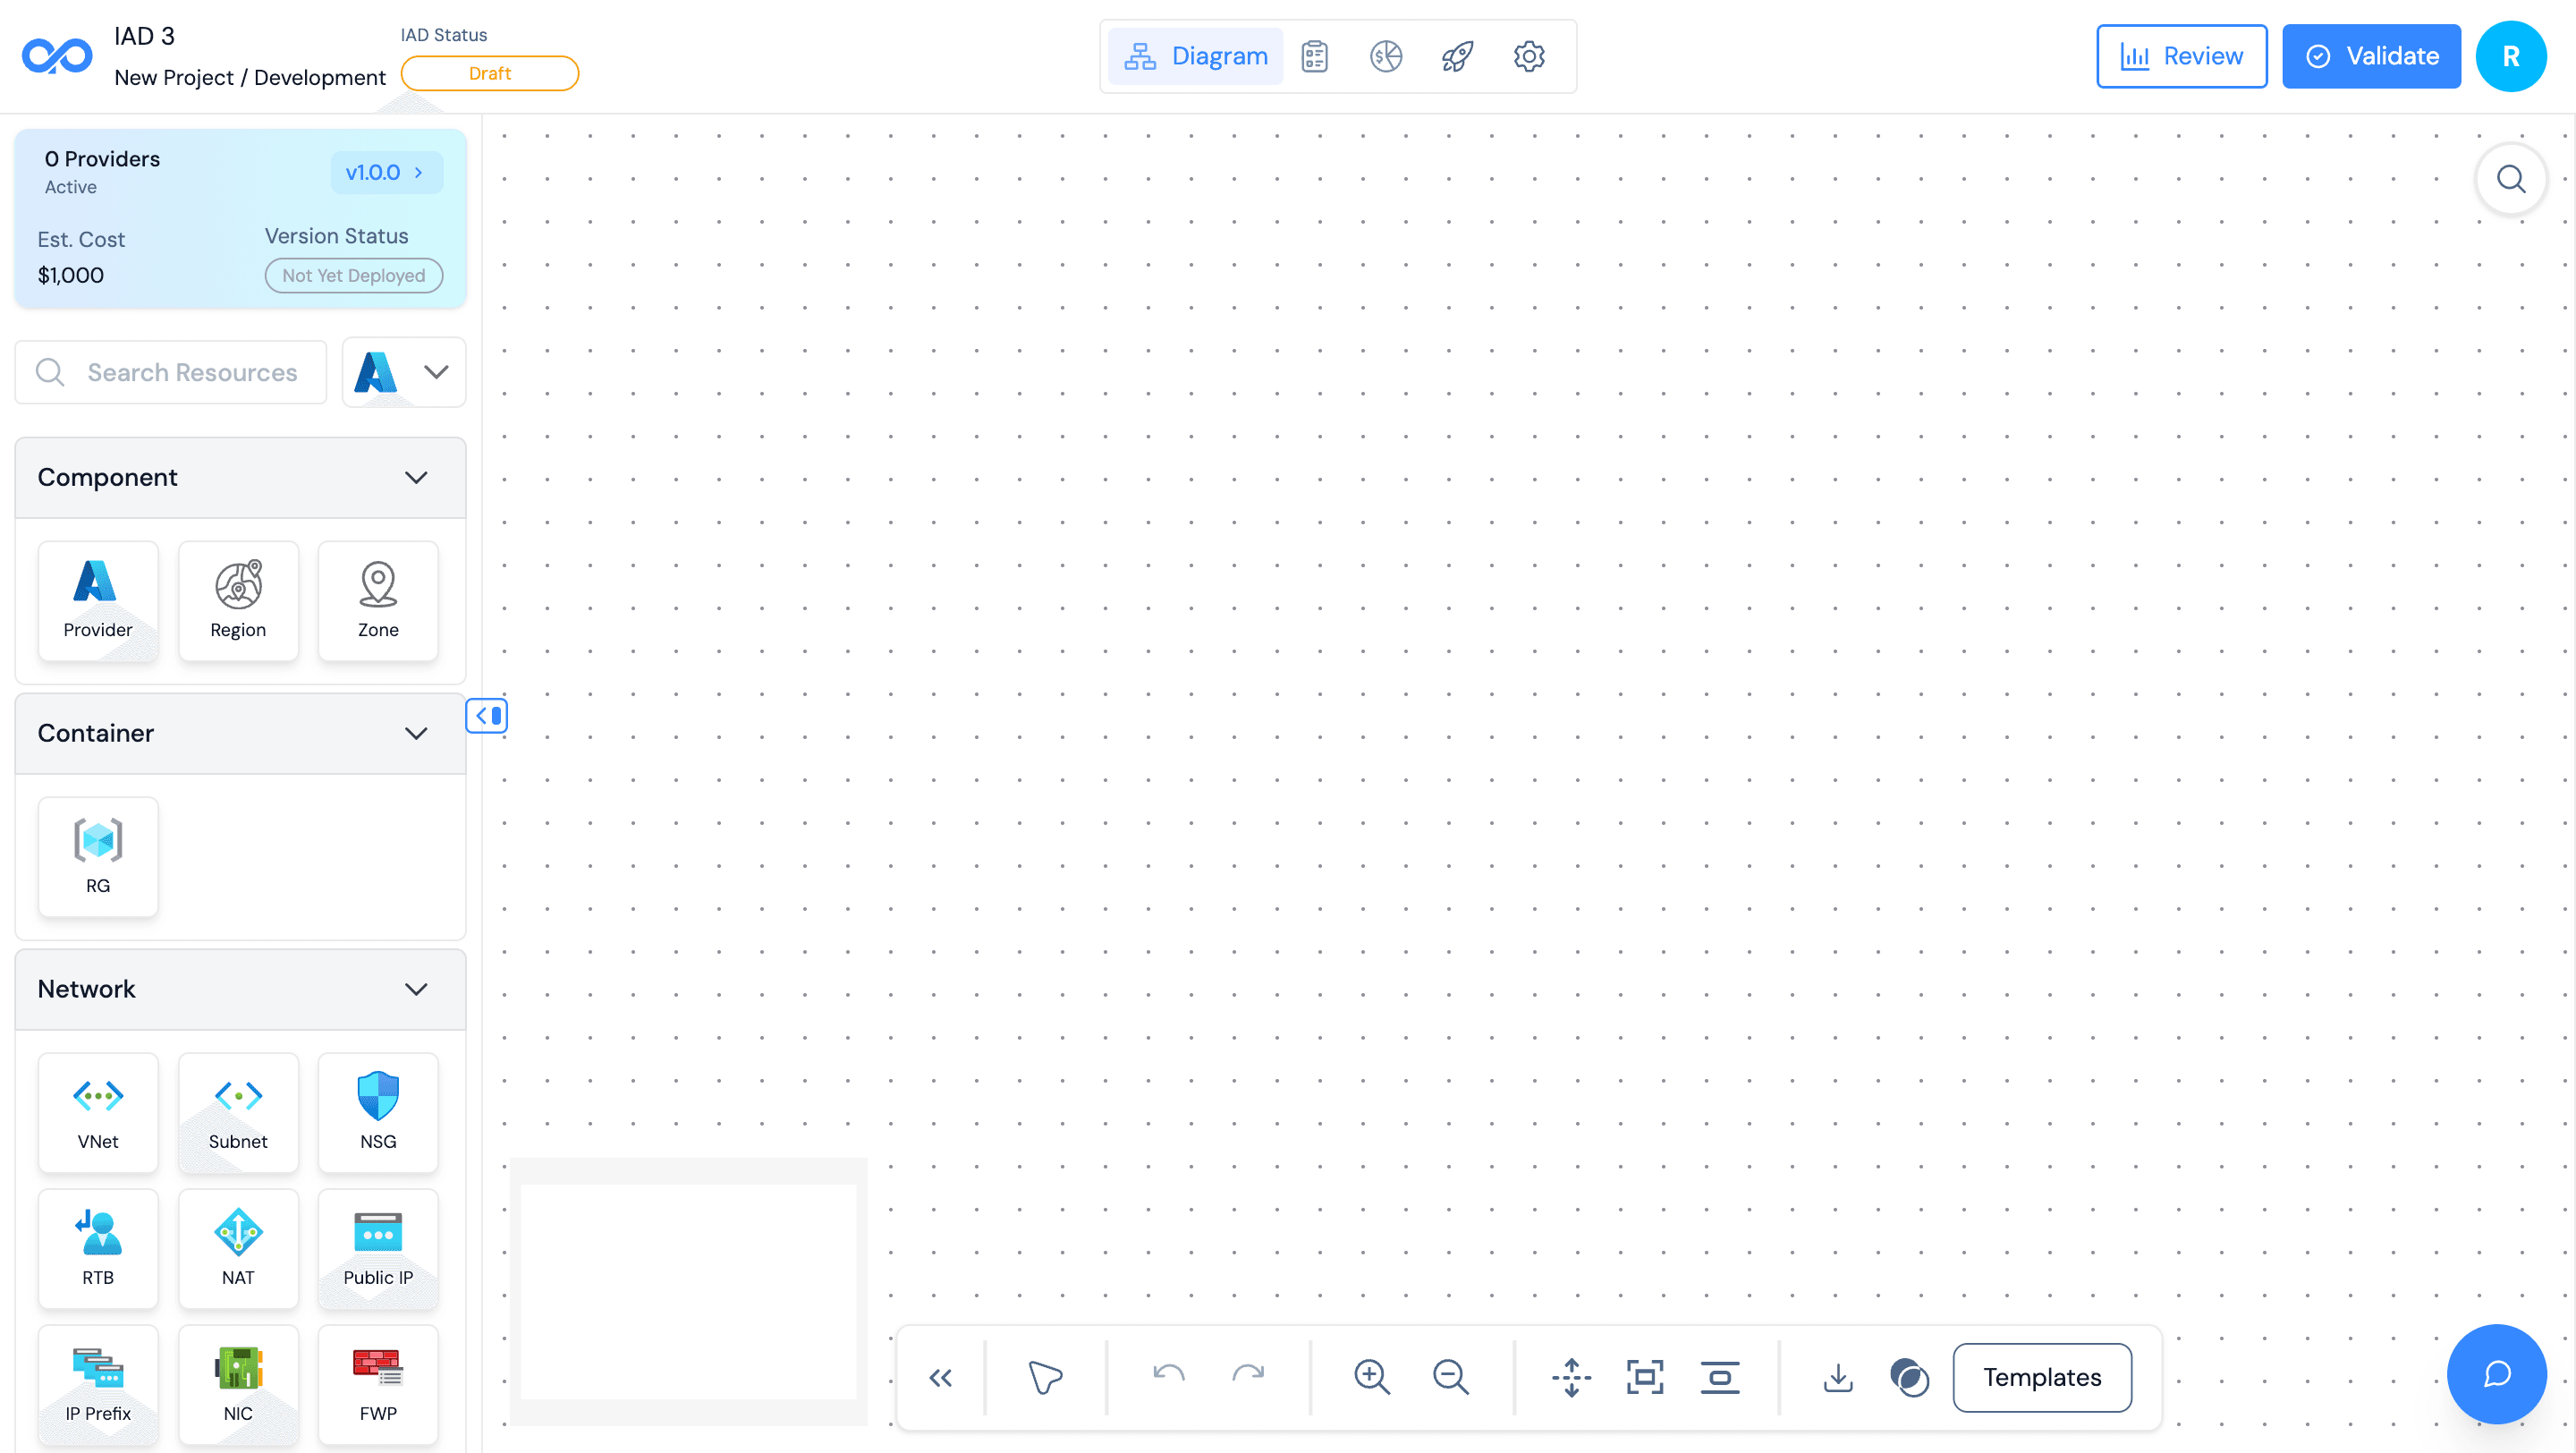
Design Your Architecture
- Drag and Drop cloud components from the component library
- Configure each component's properties and settings
- Connect components to define relationships and data flow
- Organize your architecture with proper layout and grouping
Visual Design Canvas Use the comprehensive design interface to build your cloud infrastructure with drag-and-drop components, connection tools, and real-time validation.
Architecture Successfully Created Your new IAD is now complete with all components configured, validated your cloud environment.
IAD Features:
| Feature | Description |
|---|---|
| Visual Design | Drag-and-drop interface for building infrastructure |
| Version Control | Track all changes with full version history |
| Change Tracking | See what changes were made and when |
| Multi-Cloud | Support for AWS and Azure |
| Auto-Save | Automatic saving to prevent data loss |
| Validation | Real-time validation of configurations |
Working with the Visual Canvas:
Drag & Drop
Add cloud components from the component library to your canvas
Connect Components
Draw connections to define relationships and dependencies
Configure Properties
Click any component to edit its settings and properties
Version Control
Save versions to track changes and enable rollbacks
Best Practices for IADs:
- Use Clear Naming - Name IADs descriptively (e.g., "Production-WebApp-v2")
- Version Regularly - Create versions at logical milestones
- Keep Organized - Archive old or unused IADs
- Monitor Changes - Review the change history regularly
- Test Before Deploy - Validate configurations before deploying
Ready to Build!
You now know how to organize projects and create IADs. Start building your cloud infrastructure visually!